List of Post Processing Effects
FXAAEffect
-
class
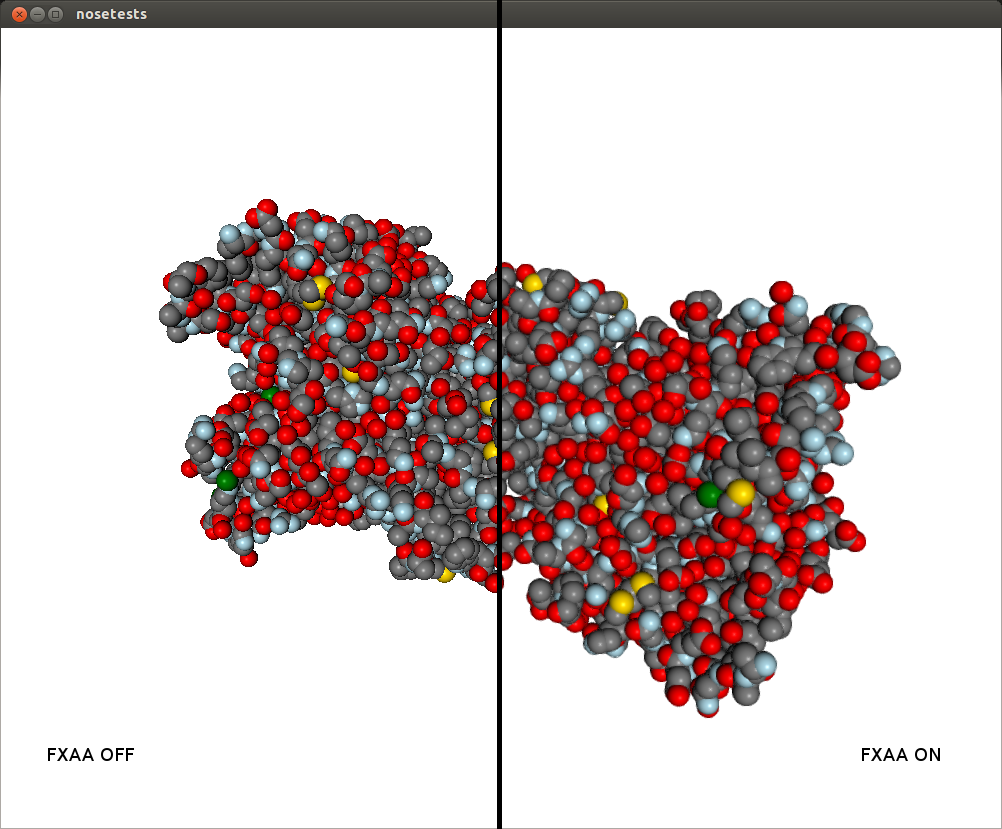
chemlab.graphics.postprocessing.FXAAEffect(widget, span_max=4.0, reduce_mul=0.125, reduce_min=0.0078125)¶ Fast Approximate Anti Aliasing. It is an efficient way to add anti-aliasing to your scenes. The reason to have it is to reduce jagged lines.
The parameters span_max, reduce_mul, reduce_min are tweakable even if it is suggested to keep them at their default value.
GammaCorrectionEffect
-
class
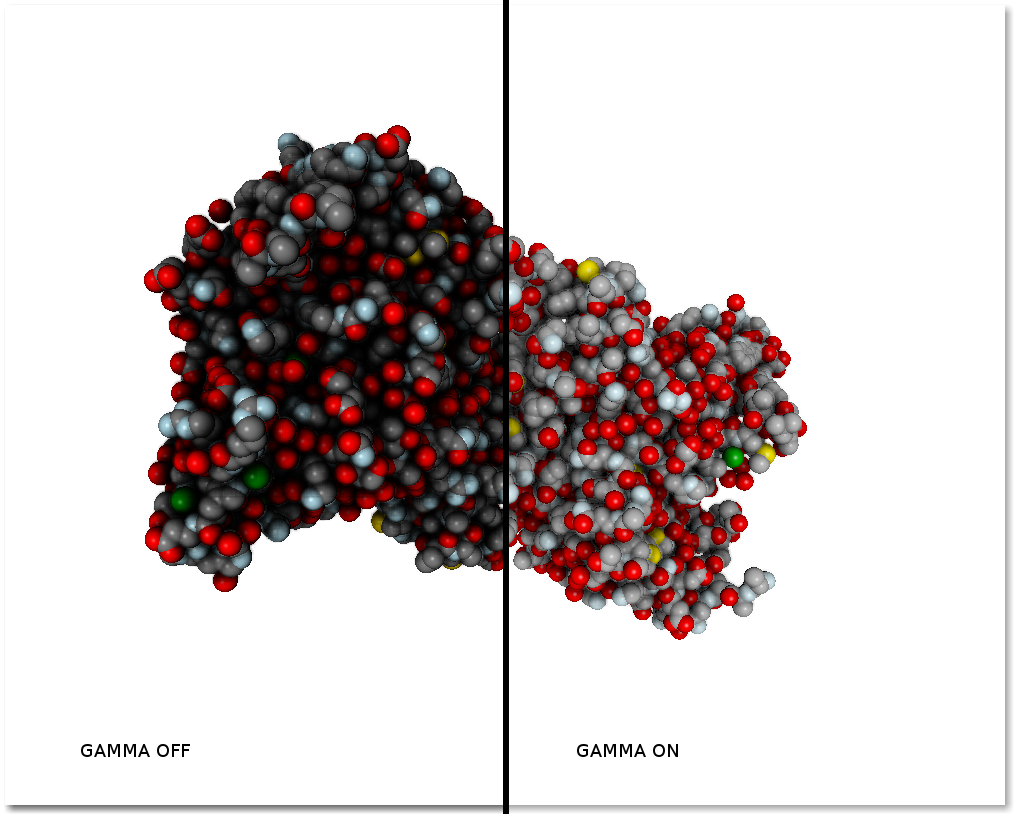
chemlab.graphics.postprocessing.GammaCorrectionEffect(widget, gamma=2.2)¶ Add gamma correction to the current scene.
Scenes displayed by OpenGL are in RGB color space. The response to colors by our eyes (and by old CRT screens) is not linear, in other words, we perceive better dark tones than light tones. As a result, the image produced is usually too dark.
To offset this effect you can apply gamma correction. The correct value is screen-dependent but it is usually between 1.8 and 2.5. You can tweak this parameter through the parameter gamma.
GlowEffect
-
class
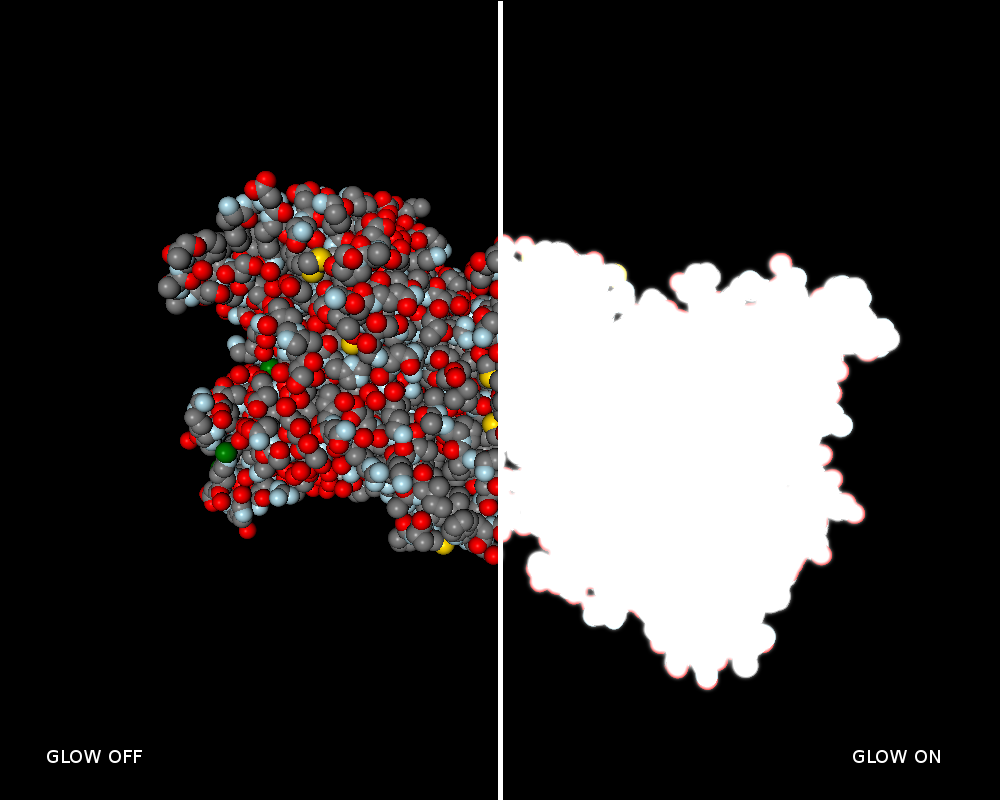
chemlab.graphics.postprocessing.GlowEffect(widget)¶ Enhance objects with a glowing effect.
This effect can be used to illuminate objects like they were small lightbulbs. It can be used for example to implement selection or special effects. To setup the illumination strength you can use the color alpha value. If the alpha value is zero, the illumination will be maximum, if the alpha is 255 no illumination will take place. If you change this value at runtime, the glowing will change accordingly.
For example, if you’re using a
SphereImpostorRenderer, to illuminate the sphere you have to setup the color like this:# Setup positions and radii # Set the alpha value to 0 for max illumination colors = np.array([[0, 0, 0, 255, 0]], 'uint8') v.add_renderer(positions, radii, colors)
NoEffect
-
class
chemlab.graphics.postprocessing.NoEffect(widget)¶ Re-render the object without implementing any effect.
This renderer serves as an example, and can be used to access the textures used for the rendering through the texture attribute.
This texture can be used to dump the image being rendered.
OutlineEffect
-
class
chemlab.graphics.postprocessing.OutlineEffect(widget, kind='depthnormal')¶ Add a black, cartoon-like outline.
This effect analyzes each point to be drawn and check if it’s at a point of discontinuity, either because there’s a change in surface normal (an edge) or because there’s a change in depth (a step). You can customize the effect by applyning just the normal or the depth test.
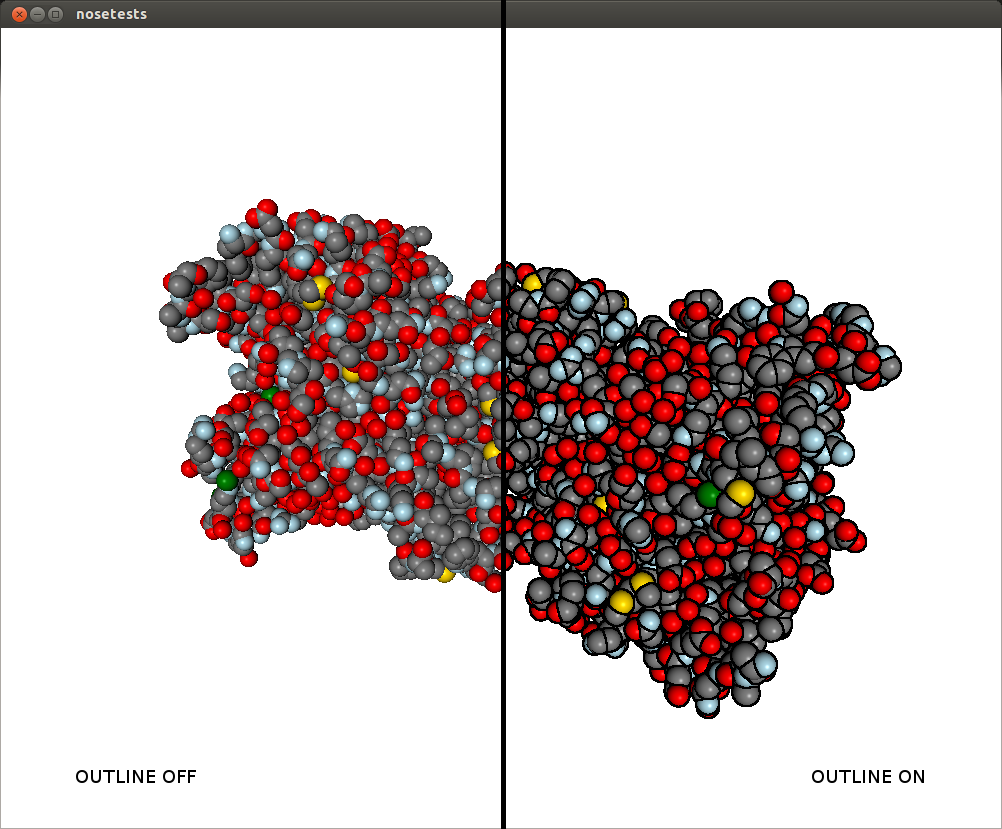
Parameters
kind: ‘depthnormal’ | ‘depthonly’ | ‘normalonly’
Set the edge-determination test to both depth and normal discontinuity or either one of the two.
SSAOEffect
-
class
chemlab.graphics.postprocessing.SSAOEffect(widget, kernel_size=32, kernel_radius=2.0, ssao_power=2.0)¶ Screen space ambient occlusion.
This effect greatly enhances the perception of the shape of the molecules. More occluded areas (pockets) are darkened to produce a more realistic illumination. For each pixel to draw, the algorithm randomly samples its neighbourhood to determine how occluded is the point. The effect can be tweaked to increase the darkening, the accuracy and the sensibility to small pockets.
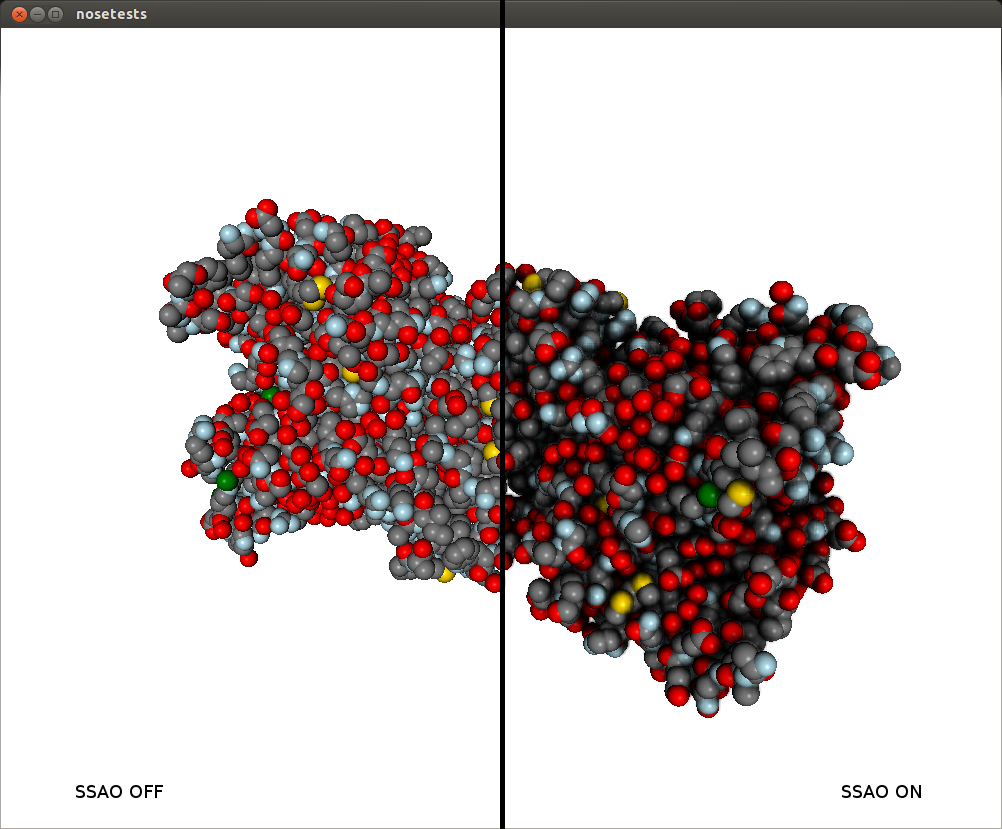
Parameters
kernel_size: int (min 1 max 128), default 32
The number of random samples used to determine if an area is occluded. At small values the performance is good and the quality is bad, at high value is the opposite is true.kernel_radius: float, default 2.0
The maximum distances of the sampling neighbours. It should be comparable with the pocket size you intend to see. At small values it’s smoother but will darken just small pockets, at high values will reveal bigger pockets but the result would be more rough.ssao_power: float, default 2.0
Elevate the darkening effect to a certain power. This will make the dark areas darker for a more dramatic effect.